Search Results
169 results found with an empty search
- Unlocking the Power of DeepSeek with Janitor AI: Your Ultimate Guide
Janitor AI has gained traction for providing users with a flexible front end to interact with large language models (LLMs) through roleplay, chat, and custom AI workflows. While many default to OpenAI or Claude, interest in using DeepSeek as an alternative model is on the rise. This is especially true for those seeking more control, lower costs, or a different reasoning style. This guide walks you through the complete setup process for using DeepSeek with Janitor AI . We’ll explain how the connection works, highlight common mistakes, and ensure you avoid pitfalls that can cause setups to fail. No assumptions. No hand-waving. Just the full system, step by step. Setting up DeepSeek on Janitor AI can significantly enhance your workflow. It enables efficient data search and retrieval within your AI environment. This guide covers everything from initial preparation to advanced configuration, ensuring you maximize DeepSeek’s capabilities on Janitor AI. Whether you’re a developer, data scientist, or AI enthusiast, this detailed tutorial will help you integrate DeepSeek smoothly and leverage its features for enhanced productivity. Understanding the Architecture Before You Start Before diving into settings, it’s crucial to grasp one key fact: Janitor AI does not host AI models. It serves as a client interface . This means Janitor AI connects to external AI providers using an API (Application Programming Interface). When you “use DeepSeek on Janitor AI,” you’re essentially: Acquiring an API key from DeepSeek. Instructing Janitor AI on how to communicate with DeepSeek’s API. Routing your character chats through that API. If any of these steps go awry, the system fails—often without a clear error message. What Is DeepSeek and Why Use It? DeepSeek is a family of large language models celebrated for their strong reasoning, coding ability, and competitive performance at a lower cost compared to many mainstream providers. Why choose DeepSeek on Janitor AI? Lower or more predictable pricing. Strong long-form reasoning and dialogue. Fewer stylistic constraints than some mainstream APIs. Better control over temperature and output style. However, remember: DeepSeek is not plug-and-play with Janitor AI unless configured correctly. Step 1: Create a DeepSeek Account and Generate an API Key To access DeepSeek’s API, follow these steps: Visit DeepSeek’s official platform. Create an account. Navigate to the API or developer dashboard. Generate a new API key. Important details: Treat the API key like a password. Do not share it publicly. If it leaks, revoke it immediately. Store the key securely; you’ll need it exactly as provided. Step 2: Identify the Correct DeepSeek API Base URL This is where many setups falter. Janitor AI requires a base URL for the API. DeepSeek offers multiple endpoints depending on model version and infrastructure. Typically, the base URL looks like: or a versioned variant such as: Verify the exact base URL required for chat completions in DeepSeek’s documentation. Janitor AI will not auto-correct this for you. Just one missing /v1 can lead to constant errors. Step 3: Open Janitor AI API Settings Now, let’s move to Janitor AI: Log in to Janitor AI. Open Settings . Navigate to API / Model Settings . Look for Custom API or OpenAI-Compatible API . Janitor AI treats most external models as OpenAI-compatible , meaning they follow a similar request format. DeepSeek supports this structure, which is why the integration works. Step 4: Configure Janitor AI for DeepSeek In the API configuration section, enter the following: API Key Paste your DeepSeek API key . API Base URL Paste the DeepSeek base URL (for example): Model Name This must match a valid DeepSeek model identifier, such as: deepseek-chat deepseek-coder or another model listed in their documentation. If the model name is incorrect, Janitor AI will fail silently or return empty responses. Step 5: Adjust Model Parameters for Stability DeepSeek behaves differently from OpenAI or Claude. Default settings often yield unstable or overly verbose results. Recommended starting values: Temperature: 0.7 Top-p: 0.9 Max tokens: 2,000–4,000 Frequency penalty: low or zero Presence penalty: low If responses feel erratic, lower the temperature first , not the top-p. Step 6: Assign DeepSeek to a Character or Chat Janitor AI allows per-character or per-chat model selection: Open a character. Go to character settings. Select Custom / API model . Choose your DeepSeek configuration. Save changes. This step is often overlooked. If you don’t explicitly assign the model, Janitor AI may revert to a default provider. Step 7: Test with Controlled Prompts Before engaging in real roleplay or lengthy chats, test with something simple: “Respond in one sentence explaining what model you are.” If DeepSeek is functioning correctly, it should respond immediately and consistently. If you encounter: Infinite loading Empty replies “Model not found” Rate limit errors The issue is likely due to: Incorrect base URL Incorrect model name Invalid API key Common Errors and How to Fix Them Error: “No response / endless loading” Cause: Wrong base URL or missing /v1. Error: “Model not found” Cause: Model name doesn’t match DeepSeek’s API exactly. Error: Very short or cut-off replies Cause: Max tokens set too low. Error: Rambling or incoherent responses Cause: Temperature too high for DeepSeek’s defaults. Performance and Cost Considerations DeepSeek is generally more affordable than OpenAI for extended conversations, but costs still scale with: Token count Context length Retry attempts Janitor AI does not cap your spending automatically. Set usage limits inside the DeepSeek dashboard if available. Failing to do this can lead to unexpected charges, especially during long roleplay sessions. Privacy and Data Flow Reality Check When using DeepSeek through Janitor AI: Janitor AI sends prompts to DeepSeek. DeepSeek processes the text. Responses return to Janitor AI. Your data is handled according to DeepSeek’s API policy , not Janitor AI’s alone. If privacy is a concern, read DeepSeek’s retention terms carefully. Setting Up DeepSeek on Janitor AI: Precision is Key Setting up DeepSeek on Janitor AI is not hard—but it is exact. Most failures occur because users assume: The base URL doesn’t matter. Any model name will work. Default settings are safe. They aren’t. Once configured correctly, DeepSeek can be a powerful, flexible alternative inside Janitor AI. It’s especially beneficial for users who want deeper reasoning, fewer constraints, or better cost control. The setup is mechanical. Precision beats experimentation. Get the plumbing right, and everything else flows smoothly. Companies and Organizations Working with DeepSeek While direct corporate endorsements of DeepSeek within Janitor AI are limited (since Janitor AI is primarily a user-managed interface), there are documented cases of high-profile companies and sectors adopting DeepSeek’s technology or experimenting with its models. These usages reveal the environments where DeepSeek is being trusted or trialed at scale. Chinese Tech and Telecom Leaders Several major players in China’s technology and infrastructure landscape have announced integrations or collaborations with DeepSeek models, particularly the open-source DeepSeek R1 . This model has been publicly released and widely tested: Great Wall Motor has integrated DeepSeek’s AI into its “Coffee Intelligence” connected vehicle system , using the model to power in-car conversational and assistance features. This shows how DeepSeek can be applied beyond chat interfaces into real-world consumer products. China Mobile, China Unicom, and China Telecom have publicly stated that they are working with DeepSeek’s open-source model to promote broader AI adoption across services, infrastructure, and consumer platforms. In addition, other Chinese firms like Capitalonline Data Service and MeiG Smart Technology Company have acknowledged work on DeepSeek-related efforts or research integration, although they caution that business outcomes and impacts are still emerging. These deployments indicate that DeepSeek is not just a niche research project but is being actively explored by companies with significant scale, customer bases, and operational demands. AI-Driven Service Integration Outside China While Chinese technology firms are the most clearly documented adopters, there are important usage patterns beyond China—indicative of DeepSeek’s relevance in professional and commercial settings: Integrated Search Engines: The AI search platform Perplexity has incorporated DeepSeek’s R1 model into its Pro Search offering. This means users can choose DeepSeek as the underlying model to answer queries, perform research tasks, and generate detailed responses. This is a direct example of a commercial service utilizing DeepSeek’s reasoning capabilities in a real-world product experience. This type of integration highlights how DeepSeek is being used outside simple experimentation and in public-facing services where user experience and accuracy are paramount. Broader Industry Attention and Competitive Landscape Even when not directly integrated, DeepSeek’s impact is visible in the strategic responses of big tech: AI Innovation Dynamics: DeepSeek’s launch and rapid adoption have prompted some global tech firms (including Meta, Tencent, and Huawei) to publicly acknowledge experiments with or adaptations of DeepSeek models within internal projects or research environments. While these engagements vary in scope and depth, they signal that DeepSeek’s technology is being noticed and tested by some of the largest organizations in the world. This could include: Prototyping DeepSeek-based agents for niche business units. Testing reasoning capabilities against internal benchmarks. Evaluating affordability and performance compared with other LLMs. These kinds of explorations often precede wider adoption or formal integration once the technology proves mature and compliant with enterprise requirements. Janitor AI-Specific Context It’s essential to clarify what Janitor AI actually represents : Janitor AI is a platform/interface that allows individuals and teams to connect various language models (including DeepSeek) to customized chat experiences. Janitor AI doesn’t sign enterprise licensing deals in its own name; instead, users bring their own API keys and provider connections (as you do when configuring DeepSeek). This limits the number of public “enterprise case studies” tied specifically to Janitor AI + DeepSeek. However, because DeepSeek is being adopted by serious commercial players and widely integrated into services like Perplexity , it demonstrates that the model you connect to Janitor AI is production-ready in multiple corporate contexts —it’s not just a hobbyist project. What This Means for You The takeaway isn’t just a list of names or logos—it’s a signal about trust and maturity : DeepSeek’s open-source models are being actively deployed by large organizations and services. Major telecom carriers and an automaker have announced integration; international AI applications are incorporating DeepSeek into search and interaction engines. DeepSeek’s models are no longer “small experiments” but part of real product pipelines being tested and used at scale. This reinforces that connecting DeepSeek to Janitor AI isn’t a fringe hack—it’s using a model that enterprises have already integrated into commercial offerings elsewhere. Final Notes and Conclusion Connecting DeepSeek to Janitor AI is not a novelty setup or a fringe workaround. It is an implementation of a well-established AI deployment pattern: a clean interface layer connected to a reasoning model via API. This same structure is already used in automotive systems, telecom platforms, internal enterprise tools, and AI-powered search products. Janitor AI simply makes that architecture accessible without requiring a custom frontend or backend to be built from scratch. When configured correctly, this setup gives you predictable behavior, scalable performance, and control over how the model reasons and responds. When configured poorly, it fails quietly. Precision matters. Model names, base URLs, parameters, and routing choices are not cosmetic details; they are the system. If you are evaluating this stack for serious use, the real decision is not whether Janitor AI or DeepSeek are “good enough,” but whether you want to spend time building infrastructure or focus on outcomes. This guide is meant to remove ambiguity so you can make that decision with clarity. If you need help setting this up properly, validating your configuration, or adapting it for a production or semi-production use case, you can reach us directly at: https://www.emeraldskygroup.com/contact We help teams and individuals implement AI systems correctly the first time, without guesswork or trial-and-error debt.
- What is JavaScript ?
What is JavaScript? (Complete Guide for Beginners and Businesses) Most websites look simple on the surface. You click, scroll, type, and things just work. But under that smooth experience is a system constantly reacting to you in real time. That system is largely powered by JavaScript. If you are building a website, running a business online, or trying to understand how modern digital products work, ignoring JavaScript creates a blind spot. You end up using tools without understanding their limits, which eventually costs time, performance, or money. Understanding JavaScript is not just for developers. It is about understanding how the web actually functions. What is JavaScript? JavaScript is a programming language used to control the behavior of websites. It allows a page to respond to users instead of just displaying information. Without it, websites would be static—meaning every interaction would require loading a completely new page. While HTML provides structure and CSS handles design, JavaScript adds behavior . In simple terms: HTML = structure (the skeleton) CSS = style (the appearance) JavaScript = functionality (the brain) JavaScript runs directly in the browser, allowing web pages to respond to user actions in real time. With JavaScript, websites become interactive systems. They can update content instantly, validate user input, animate elements, and communicate with servers without interrupting the user experience. Without JavaScript, websites would be static and limited. JavaScript allows developers to: Update content without reloading the page Validate form inputs instantly Create animations and visual effects Build interactive user interfaces Communicate with servers (APIs) Develop full web applications Today, JavaScript is used by nearly every modern website, including platforms like Google, Facebook, and Amazon. This is what separates a basic website from a modern web application. Why JavaScript Matters More Than You Think There is a common misconception that JavaScript is just a “developer tool.” In reality, it directly affects how users experience your website. A slow checkout process, forms that reload the page, or clunky navigation often come down to poor or missing JavaScript implementation. On the other hand, a fast, responsive, and seamless interface is usually powered by well-structured JavaScript. From a business perspective, this impacts: Conversion rates User retention Page speed perception Overall credibility A site that feels outdated or unresponsive loses trust quickly, even if the product itself is good. How JavaScript Works Behind the Scenes When a user visits a website, the browser loads the structure (HTML) and the design (CSS). Then JavaScript runs and activates the page. Here’s the basic flow: A user loads a webpage The browser reads HTML and CSS JavaScript code is executed The page becomes interactive JavaScript can: Respond to clicks and keyboard input Modify HTML content dynamically Control CSS styles Fetch data from external sources It listens for actions—like clicks, typing, or scrolling—and decides what should happen next. For example, when someone clicks “Add to Cart,” JavaScript can instantly update the cart count, display a confirmation message, and store the data, all without reloading the page. This real-time interaction is what makes modern websites feel fast and intuitive. Key Features, Use Cases, and Core Concepts of JavaScript JavaScript stands out because it is both flexible and deeply integrated into how the web works. It is not just a scripting tool—it is a system that allows websites to behave like applications. Core Features of JavaScript At the heart of JavaScript is flexibility. One of its defining characteristics is dynamic typing, which allows variables to hold different types of data without strict definitions. let value = 10;value = "Now I'm text"; This flexibility makes development faster, but it also requires discipline as projects grow. JavaScript is also event-driven, meaning it reacts to user behavior. Instead of running once and stopping, it continuously listens for actions and responds accordingly. document.getElementById("btn").addEventListener("click", function() { console.log("Button clicked");}); Another key trait is that JavaScript is interpreted directly in the browser. There is no compilation step required, so changes can be tested instantly. Combined with its cross-platform nature, this allows the same code to run on nearly any device with a browser. One of the most powerful features, especially in modern applications, is asynchronous execution. This allows JavaScript to handle tasks like API requests in the background without freezing the interface. async function fetchData() { const response = await fetch("https://api.example.com/data"); const data = await response.json(); console.log(data);} What You Can Build with JavaScript Because of these capabilities, JavaScript is used across almost every type of digital product. It powers everything from simple interactions to full-scale platforms. Here are the main things you can build with JavaScript: Interactive websites with animations, forms, and dynamic content Full web applications such as dashboards, SaaS platforms, and marketplaces Mobile applications using frameworks like React Native Server-side systems using Node.js Browser-based games, including advanced 2D and 3D experiences This range is what makes JavaScript one of the most versatile programming languages in existence. JavaScript Compared to Other Languages JavaScript occupies a very specific role in development. While Python is often used for automation and data analysis, and Java is widely used in enterprise systems, JavaScript is essential for front-end development because it runs directly in the browser. This ability to execute inside the browser is what makes it unavoidable in web development. No other language has this level of native integration with the web. Fundamental JavaScript Concepts Every JavaScript program, no matter how complex, is built on a few core ideas. Variables are used to store data: let name = "Marco"; Functions allow you to reuse logic: function greet() { console.log("Hello");} Conditions control decision-making: if (age > 18) { console.log("Adult");} Loops handle repetition: for (let i = 0; i < 5; i++) { console.log(i);} These concepts may look simple, but they are the foundation of everything from small scripts to large-scale applications. Frameworks and the JavaScript Ecosystem JavaScript alone is powerful, but its ecosystem is what makes it dominant. Frameworks like React, Vue, and Angular help developers structure complex interfaces and manage large applications efficiently. On the server side, Node.js allows JavaScript to handle backend logic, databases, and APIs. This ecosystem transforms JavaScript from a simple scripting language into a complete development environment capable of powering modern digital products at scale. JavaScript Beyond the Front-End JavaScript is no longer limited to the browser. With technologies like Node.js, it can also run on servers. This means the same language can handle both what users see (front-end) and what happens behind the scenes (back-end). This shift made development faster and more efficient. Instead of juggling multiple languages, developers can build entire systems using JavaScript. For businesses, this often translates into faster development cycles and easier scalability. The Risk of Not Understanding JavaScript Here’s where things get practical. If you rely on websites for business but don’t understand JavaScript at all, you risk: Using slow or poorly optimized templates Adding too many scripts that hurt performance Breaking functionality without realizing it Relying entirely on third-party tools without control This is especially common with DIY website builders or poorly managed plugins. The result is usually a site that looks fine but performs poorly, which quietly reduces conversions and SEO performance. Using JavaScript the Right Way You don’t need to become a developer, but you do need awareness. A well-built website uses JavaScript strategically. It enhances the experience without slowing the site down. It loads only what is necessary and executes efficiently. This balance is what separates high-performing websites from average ones. For developers, it means writing clean, structured code. For business owners, it means working with people or tools that understand performance, not just design. JavaScript and SEO: What You Should Know There was a time when JavaScript caused major SEO issues. Search engines struggled to read content generated dynamically. Today, search engines like Google are much better at processing JavaScript. However, problems still occur when sites rely too heavily on it without proper optimization. If JavaScript blocks content from loading quickly or hides important information, it can still hurt rankings. This is why performance and structure matter just as much as functionality. The JavaScript Ecosystem JavaScript has grown into an entire ecosystem. Frameworks like React, Vue, and Angular help developers build complex interfaces efficiently. They provide structure and make it easier to manage large applications. On the server side, Node.js allows JavaScript to handle databases, APIs, and authentication systems. This ecosystem is one of the reasons JavaScript dominates modern development. It is not just a language—it is an environment for building complete digital products. Is JavaScript Hard to Learn? At the surface, JavaScript is accessible. You can write simple scripts quickly and see immediate results. But as you go deeper, the complexity increases. Concepts like asynchronous operations, data flow, and application architecture require time to understand. This is where many beginners struggle. The key is consistency. JavaScript rewards practical learning—building small projects, testing ideas, and gradually increasing complexity. The Future of JavaScript JavaScript is not going anywhere. It continues to evolve with regular updates that improve performance and usability. It is also expanding into areas beyond traditional web development, including mobile apps, desktop applications, and even emerging technologies. Few programming languages maintain this level of relevance over time. JavaScript has done it by adapting continuously. React and React Native: Turning JavaScript into Real Applications As JavaScript projects grew more complex, developers needed better ways to organize code and build scalable interfaces. This is where tools like React and React Native come in. They are not separate languages. They are built on top of JavaScript and extend what it can do. What is React? React is a JavaScript library used to build user interfaces, especially for web applications. Instead of managing an entire page as one large block, React breaks the interface into small, reusable pieces called components. Each component controls its own structure and behavior, making applications easier to build and maintain. For example, a button, a navigation bar, or a product card can each be their own component: function Button() { return Click me;} These components can then be reused across the entire application, which reduces repetition and keeps code organized. React also uses something called a virtual DOM (Document Object Model). In simple terms, instead of updating the entire page every time something changes, React updates only the parts that need to change. This makes applications faster and more efficient. Why React is Widely Used React became popular because it solves a real problem: complexity. As applications grow, managing updates, data flow, and user interactions becomes difficult. React introduces structure without being overly rigid. It allows developers to: Build interfaces using reusable components Manage dynamic data more cleanly Improve performance with efficient updates Scale applications without losing control of the codebase Because of this, React is used by many large platforms and is considered one of the standard tools for modern front-end development. What is React Native? React Native takes the same ideas behind React and applies them to mobile app development. Instead of building websites, React Native allows developers to create native mobile applications for iOS and Android using JavaScript. The key difference is that React Native does not render HTML. Instead, it uses native components provided by the operating system, which makes the app feel like a real mobile application rather than a web app inside a wrapper. Here’s a simple example: import { Text, View } from "react-native";export default function App() { return ( Hello Mobile App );} Even though it looks similar to React, it produces actual mobile UI elements instead of web elements. React vs React Native React and React Native share the same core principles but are used in different environments. React is used for building websites and web applications that run in the browser. React Native is used for building mobile applications that run directly on devices. The advantage is that developers can reuse knowledge, logic, and even some code between both. This reduces development time and makes it easier to maintain multiple platforms. Why This Matters for Real Projects This is where things become practical. Without tools like React, building large applications becomes messy and difficult to scale. With React, projects are structured, reusable, and easier to maintain. With React Native, businesses can build mobile apps without needing completely separate teams for iOS and Android development. The result is faster development, lower costs, and more consistent user experiences across platforms. The Bigger Picture React and React Native represent a shift in how software is built. Instead of thinking in terms of pages, developers think in terms of components and systems. Instead of rebuilding everything for each platform, they reuse logic and structure. This approach is one of the main reasons JavaScript continues to dominate modern development. The History of JavaScript JavaScript has one of the most unusual origin stories in all of technology. It wasn’t carefully planned over years or designed by a massive team. It was created quickly, almost experimentally, in 1995 at a time when the internet itself was still figuring out what it wanted to be. Back then, websites were mostly static. You could read information, click links, and move from page to page, but there was very little interaction. Netscape, one of the earliest web browser companies, saw the need for something more dynamic—something that could make websites respond to users in real time. They assigned Brendan Eich to build a scripting language that could run directly in the browser, and in just 10 days, the first version of JavaScript was born. Coming Up With a Name It didn’t even start with that name. The language was first called Mocha, then LiveScript, before being renamed JavaScript as a marketing move to ride the popularity of Java at the time. Despite the name, the two languages are fundamentally different, which has caused confusion ever since. Early adoption was fast, but it came with a major problem. Different browsers began implementing their own versions of the language. Netscape had JavaScript, while Microsoft introduced its own variation called JScript for Internet Explorer. This led to a chaotic period where developers had to write multiple versions of the same code just to make things work across different browsers. To solve this, JavaScript was standardized in 1997 under a specification called ECMAScript. This created a common set of rules that browsers could follow, bringing some much-needed stability. Even with standardization, JavaScript was still seen as a limited tool for many years. It was mostly used for small enhancements like form validation or simple animations, and many developers didn’t consider it suitable for building serious applications. It existed in the background, useful but not central. Introduction of AJAX That perception changed in the early 2000s with the introduction of AJAX, a technique that allowed websites to send and receive data without reloading the page. This was a turning point. Suddenly, websites could behave more like applications, updating content dynamically and responding instantly to user input. Experiences that feel normal today—like scrolling through content without refreshing or interacting with live data—were revolutionary at the time. JavaScript moved from being a minor helper to a core part of the user experience. As its importance grew, so did the tools around it. Libraries like jQuery made it easier to write JavaScript and handle browser inconsistencies, which helped accelerate adoption. Then came frameworks like Angular, React, and Vue, which introduced structured ways to build large and complex applications. Developers were no longer just adding small scripts to pages—they were building entire systems using JavaScript. This marked a major shift in how software was developed for the web. Another turning point came in 2009 with the release of Node.js, which allowed JavaScript to run outside the browser on servers. This changed everything. Instead of being limited to front-end interactions, JavaScript could now handle backend logic, databases, and APIs. Developers could use a single language across an entire application, which simplified workflows and made development more efficient. This expansion is one of the main reasons JavaScript became so dominant. At the same time, the language itself continued to evolve. Updates to the ECMAScript standard, especially the major ES6 update in 2015, introduced features that made JavaScript more powerful and easier to work with. Improvements like arrow functions, classes, and better variable handling helped modernize the language and made it more suitable for large-scale applications. Today, JavaScript is everywhere. It runs in browsers, servers, mobile apps, and even desktop software. It has grown from a quickly built scripting tool into one of the most important technologies in the world. What makes its history interesting is not just how it started, but how it adapted. It was never perfect, and it faced plenty of criticism along the way, but it kept evolving to meet new demands. That adaptability is the real story behind JavaScript. It didn’t become dominant because it started strong. It became dominant because it kept changing, improving, and expanding while the web itself grew more complex. In a field where technologies come and go constantly, that kind of persistence is what turns a simple tool into a foundation. Conclusion JavaScript is the engine that transforms websites from static pages into fully functional, interactive systems. It powers everything from simple user interactions to complex web applications, and with tools like React and React Native, it extends far beyond the browser into full-scale platforms and mobile apps. What starts as a scripting language quickly becomes the foundation for building modern digital products. Understanding JavaScript is not just about writing code. It is about understanding how websites respond, how applications scale, and how user experiences are shaped in real time. Ignoring it means depending on systems you cannot fully control or optimize. Learning it—even at a basic level—gives you the ability to make better decisions, build more efficiently, and create experiences that actually perform in the real world. Want a Website That Actually Performs? A poorly built site costs more than you think. Slow interactions, broken functionality, and bad user experience reduce trust and conversions over time. If your website relies heavily on templates or plugins without optimization, it may already be underperforming. A properly structured site with optimized JavaScript can dramatically improve speed, usability, and results. If you want help developing your website with JavaScript don't hesitate to get in touch with us at Emerald Sky Group.
- Is Deepseek Better Than ChatGPT ?
The short answer: sometimes yes, sometimes no. The two systems were built with different design goals, and which one performs “better” depends heavily on the task you are trying to accomplish. Below is a balanced, evidence-based breakdown based on benchmarks, academic evaluations, and industry commentary. DeepSeek vs ChatGPT: A Real Comparison 1. Reasoning and Mathematics DeepSeek’s flagship reasoning model (R1) was designed specifically to excel at structured reasoning tasks such as mathematics, logic problems, and technical derivations. Several benchmarks show DeepSeek performing extremely well in this area. For example: DeepSeek R1 has achieved around 90% accuracy on certain reasoning benchmarks , compared with roughly 83% for GPT-4o in similar tests. DeepSeek has also scored higher on benchmarks such as AIME and MATH-500 , which focus on complex mathematical reasoning. Because of this design focus, DeepSeek often produces explicit reasoning chains when solving problems, which can make its outputs easier to verify in technical contexts. In short: DeepSeek frequently performs better in: mathematics symbolic reasoning structured logic problems 2. Coding Performance The picture becomes more mixed in programming. Some benchmark comparisons show DeepSeek performing slightly better on certain coding datasets. For example: DeepSeek-V3 achieved roughly 82–83% on the HumanEval coding benchmark , slightly ahead of GPT-4’s 80–81% pass rate. However, academic testing has also shown cases where ChatGPT performs better on more complex programming tasks. One study comparing the models on competitive programming tasks found that ChatGPT solved more medium-difficulty problems , while both models struggled with extremely difficult ones. So in real-world coding workflows: ChatGPT often remains stronger in: large software projects debugging conversations interactive coding assistance 3. General Knowledge and Conversational Ability ChatGPT still tends to dominate when it comes to: conversational flow writing quality explanation clarity general knowledge questions Benchmarks measuring broad knowledge (like MMLU) show OpenAI models slightly ahead overall. For instance, one comparison found OpenAI’s model scoring 91.8% versus 90.8% for DeepSeek on general knowledge evaluation tasks. This difference reflects how ChatGPT was trained: it is optimized not only for reasoning but also for natural dialogue and helpful explanations . 4. Cost and Efficiency One area where DeepSeek clearly stands out is cost efficiency. DeepSeek’s models are known for being much cheaper to run than many competing models, while still delivering strong performance. This is one of the main reasons developers and companies experiment with DeepSeek when building custom AI systems. Lower cost makes it attractive for: large-scale automation agent systems high-volume API usage experimentation with open model architectures 5. Industry Recognition DeepSeek’s capabilities have not gone unnoticed by major industry figures. According to reporting, Microsoft CEO Satya Nadella said DeepSeek’s R1 was the first model he had seen that came close to OpenAI’s performance , describing it as a serious competitor in the AI space. Executives at other AI companies have similarly described the model as impressive and a sign that the competitive landscape for large language models is expanding rapidly. When DeepSeek Is the Better Choice DeepSeek tends to shine when the task involves: advanced math logical reasoning structured problem solving large-scale automation with cost constraints custom AI infrastructure using APIs DeepSeek tends to perform particularly well in situations where the task requires structured thinking, analytical reasoning, and computational efficiency. The models developed by DeepSeek, especially the reasoning-focused systems such as DeepSeek-R1, were trained with an emphasis on solving complex logical and mathematical problems rather than purely conversational tasks. Because of this training focus, DeepSeek often produces more methodical, step-by-step reasoning when working through technical challenges. One area where DeepSeek frequently stands out is advanced mathematics and analytical calculations. Tasks that involve algebraic manipulation, multi-step equations, algorithmic reasoning, or symbolic logic often benefit from DeepSeek’s architecture and training methods. These models are designed to break problems into intermediate steps and process them sequentially, which can lead to clearer reasoning paths when tackling mathematically intensive problems. DeepSeek also performs strongly in environments that require structured problem solving. In fields such as engineering, data analysis, and algorithm design, the ability of a model to follow logical sequences and maintain consistent reasoning across several steps becomes essential. DeepSeek’s models often demonstrate an ability to maintain this structure more reliably when the task involves systematic thinking rather than open-ended creative writing. Another context where DeepSeek becomes particularly attractive is large-scale automation. Many organizations and developers need AI systems that can process high volumes of requests without generating excessive operational costs. DeepSeek’s architecture and training approach aim to deliver competitive performance while using fewer computational resources than some other large language models. This efficiency can make DeepSeek appealing for projects that require continuous automated processing, such as large-scale data analysis, automated customer support workflows, or programmatic research tools. DeepSeek is also well suited for developers who want to build custom AI infrastructure using APIs. Because the models can be accessed programmatically and integrated into external systems, they can be embedded into software pipelines, internal tools, or experimental research environments. Developers building specialized applications—such as coding assistants, research tools, or domain-specific reasoning agents—often value the ability to integrate the model directly into their own architecture rather than relying solely on a fixed consumer interface. Another factor that draws developers to DeepSeek is its relative openness compared with some competing systems. While not every model released by the company is fully open-source, several versions have been made available with accessible model weights or developer-friendly APIs. This allows independent developers, startups, and research teams to experiment with the technology, fine-tune models for specialized use cases, or explore alternative approaches to building AI-driven systems. For these reasons, DeepSeek tends to be favored in technical environments where logical reasoning, computational efficiency, and system integration are the primary priorities. In scenarios that demand structured analysis, scalable automation, or deep integration into custom software environments, DeepSeek can provide a powerful alternative to more general conversational AI systems. When ChatGPT Is the Better Choice ChatGPT generally performs better for: natural conversation writing and editing brainstorming and creativity coding assistance workflows everyday information questions ChatGPT tends to perform best in situations where the goal is natural interaction, clear explanations, and creative or conversational tasks. While many modern AI systems can generate text and answer questions, ChatGPT was specifically designed and optimized to function as a general-purpose conversational assistant. Because of this design focus, it often produces responses that feel more fluid, intuitive, and human-like in everyday dialogue. One of ChatGPT’s strongest areas is natural conversation. The system is trained extensively on dialogue-based interactions, which allows it to follow context across multiple messages and maintain coherent discussions over time. This makes it particularly useful for tasks where users want to ask follow-up questions, refine ideas gradually, or explore a topic through back-and-forth discussion. For general interaction and conversational learning, ChatGPT often feels smoother and easier to engage with than models that focus primarily on structured reasoning. ChatGPT also performs well in writing and editing tasks. Many users rely on it to draft emails, refine documents, summarize long pieces of text, or rewrite content in different tones and formats. Its training emphasizes clarity and readability, which allows it to produce text that is well organized and stylistically polished. This makes it a valuable tool for professionals who need assistance with communication, documentation, or content creation. Another area where ChatGPT excels is brainstorming and creative thinking. Whether users are developing marketing ideas, exploring story concepts, outlining research topics, or generating new product ideas, the model tends to produce diverse and imaginative suggestions. Its ability to quickly generate multiple perspectives or alternative approaches makes it particularly useful during early stages of planning and creative development. In software development contexts, ChatGPT is widely used as a coding assistant. It can help developers understand code snippets, explain programming concepts, suggest improvements, and assist with debugging. While other models may perform strongly on specific coding benchmarks, ChatGPT’s conversational style often makes it more effective for collaborative problem-solving during real development workflows. ChatGPT is also well suited for everyday information questions and general knowledge queries. Users frequently turn to it for explanations of scientific concepts, historical events, practical advice, or step-by-step guidance on common tasks. The model’s ability to explain topics clearly and adapt explanations to different levels of complexity makes it particularly useful as a learning and research companion. Finally, ChatGPT benefits from being part of a mature product ecosystem. Over time it has developed a wide range of supporting tools, integrations, and safety systems designed to improve usability and reliability. These include advanced interfaces, developer platforms, and structured moderation systems that help ensure consistent behavior across different applications. Because of these characteristics, ChatGPT often becomes the preferred choice in situations where the primary goal is communication, creativity, or general assistance rather than deep analytical reasoning. In tasks that involve writing, discussion, learning, and idea generation, it frequently provides a more polished and user-friendly experience. The Real Answer The debate is often framed incorrectly. DeepSeek is not necessarily trying to replace ChatGPT. Instead, it represents a different design philosophy in the AI ecosystem: ChatGPT > polished AI assistantDeepSeek > high-performance reasoning engine For developers and companies building AI systems, the most common strategy is not choosing one over the other but using both depending on the task . The Background of DeepSeek: Origins, Philosophy, and Technological Development DeepSeek is a relatively new entrant in the global artificial intelligence landscape, yet it has rapidly attracted attention for building high-performance large language models with a design philosophy that emphasizes efficiency, open research, and strong reasoning capabilities. Unlike some of the earliest AI companies that emerged directly from academic labs or Silicon Valley startups, DeepSeek originated within the broader ecosystem of quantitative finance and advanced computational research in China. The company behind DeepSeek was founded in 2023 by Liang Wenfeng, a Chinese entrepreneur known for his work in high-frequency trading and quantitative investment strategies. Liang is also the founder of High-Flyer, a hedge fund that had already been investing heavily in artificial intelligence infrastructure for financial modeling and algorithmic decision-making. Long before DeepSeek itself existed, High-Flyer had been accumulating large GPU clusters to train machine learning systems for market prediction and statistical analysis. This meant that when the global explosion of generative AI began after the release of large language models such as GPT-3 and GPT-4, the technical and computational foundation for building advanced models was already in place. High-Flyer’s research division gradually evolved into a dedicated artificial intelligence company: DeepSeek. The goal was not simply to build another chatbot but to create a family of high-performance language models capable of competing with some of the most advanced systems in the world while using significantly fewer computational resources. From the beginning, the team focused on building models optimized for reasoning, coding, and complex problem solving rather than purely conversational interaction. DeepSeek’s Emergence Reflects a Broader Shift in the AI Industry Early large language models were often developed primarily in the United States by companies such as OpenAI, Google, and Anthropic. These organizations built extremely large systems that required enormous computational resources to train. DeepSeek’s approach attempted to demonstrate that careful architecture design and training strategies could achieve comparable performance with far lower costs. This efficiency-focused philosophy quickly became one of the company’s defining characteristics. One of the early milestones in DeepSeek’s development was the release of DeepSeek-Coder, a specialized model designed to generate and understand programming code. The model was trained on large datasets of source code and technical documentation and quickly gained recognition within developer communities for its ability to produce structured, syntactically correct code. This release helped establish DeepSeek as a serious player in AI research rather than just another experimental startup. Following that success, the company began developing more general-purpose language models. These models were trained using large-scale datasets consisting of text from scientific papers, programming repositories, technical documents, and general internet content. Like other large language models, DeepSeek systems rely on transformer architectures—a neural network design originally introduced by researchers at Google in 2017. Transformers allow models to process language by analyzing relationships between words across long sequences of text, enabling the generation of coherent and context-aware responses. However, DeepSeek introduced several engineering optimizations intended to improve efficiency and scalability. One key area of focus was mixture-of-experts architectures, which allow only portions of the neural network to activate for a given task instead of using the entire model for every computation. This approach dramatically reduces the computational cost of generating responses while maintaining strong performance. By selectively activating parts of the network depending on the prompt, DeepSeek models can handle complex reasoning tasks more efficiently than traditional monolithic architectures. The Rise of DeepSeek’s Reasoning Models: V3 and R1 Another major milestone came with the release of DeepSeek-V3 and later DeepSeek-R1, models that focused heavily on reasoning ability. These systems were designed to perform well on mathematical and logical tasks, including complex problem-solving benchmarks used by researchers to evaluate AI reasoning. The models demonstrated strong performance on several well-known benchmarks related to mathematics, coding, and structured reasoning tasks. Their success sparked significant interest among developers, researchers, and companies exploring alternatives to more expensive proprietary models. The release of DeepSeek-R1 also introduced improvements in training methodology. The model was trained using reinforcement learning techniques that encouraged step-by-step reasoning rather than simply predicting the next word in a sequence. This approach allowed the model to produce clearer logical chains when solving problems, making its reasoning easier for users to follow and verify. Many observers viewed this as an important step toward building AI systems that can explain their thinking processes more transparently. DeepSeek’s rapid progress attracted attention across the global technology sector. Researchers and engineers began comparing its performance to leading models from other AI companies. While no single benchmark determines which model is definitively “best,” DeepSeek demonstrated that a relatively new company with fewer resources could still produce models competitive with those developed by the largest technology firms. This contributed to a growing sense that the AI landscape was becoming more competitive and decentralized. DeepSeek’s Open Research Strategy and Developer Accessibility Another distinguishing aspect of DeepSeek’s strategy has been its willingness to release models and research more openly than some competitors. While not fully open-source in every case, several DeepSeek models have been released with accessible weights or APIs that allow developers to experiment with them. This has helped the models gain traction among independent developers, startups, and research groups interested in experimenting with alternative AI architectures. The company’s development also highlights the increasing globalization of artificial intelligence research. Although many early breakthroughs in generative AI occurred in North America and Europe, DeepSeek’s success demonstrates that significant innovation is now happening in multiple regions around the world. AI research communities in China, Europe, and other parts of Asia are rapidly expanding, contributing new ideas, training methods, and engineering approaches to the field. Deepseek's Future Today, DeepSeek continues to develop new models and refine its technology. Its systems are being explored for applications ranging from programming assistance and research tools to enterprise automation and conversational interfaces. Some companies have already begun experimenting with integrating DeepSeek models into customer service platforms, research tools, and specialized industry software. What makes DeepSeek particularly significant is not only its technical achievements but also what it represents for the future of artificial intelligence. The company’s work suggests that cutting-edge AI may not remain concentrated within a handful of organizations with massive budgets. Instead, innovations in architecture, efficiency, and training techniques could allow a wider range of teams to build powerful models. In this sense, DeepSeek is part of a broader transformation occurring in the AI ecosystem. The field is moving from an era dominated by a few early pioneers toward a more competitive and diverse landscape where multiple research groups push the boundaries of what language models can do. Whether DeepSeek ultimately becomes one of the dominant players in AI remains to be seen, but its rapid rise has already demonstrated that the race to build powerful intelligent systems is far from over. Final Takeaway DeepSeek has proven that cutting-edge reasoning models can compete with the most advanced systems from major AI companies. In some benchmarks it even surpasses them. But ChatGPT still leads in usability, conversation quality, and overall user experience. In practical terms, the question is less “Which is better?” and more “Which is better for this specific job?” ________________________________________________ Need Help Building With AI? Deploying AI models like DeepSeek or integrating advanced tools such as conversational agents, automation systems, or custom AI workflows can quickly become complex. Configuration, infrastructure, API integration, and optimization all require careful planning to ensure the system works reliably and efficiently. At Emerald Sky Group , we help businesses and developers turn AI ideas into working systems. Our team works with modern AI technologies—including DeepSeek, ChatGPT-style assistants, and custom API-based solutions—to build practical tools that integrate directly into websites, applications, and internal platforms. Whether you need help setting up AI infrastructure, connecting models to your software, or developing custom AI-driven features, our team can guide the process from planning to deployment. If you’d like to explore what AI could do for your project, you can contact our team here: https://www.emeraldskygroup.com/contact
- Brave vs. DuckDuckGo: A Detailed Comparison of Two Privacy-Focused Browsers
In an era where digital privacy is becoming increasingly crucial, users are turning to browsers that prioritize their security and data protection. Among the popular choices are Brave and DuckDuckGo . Both browsers promise enhanced privacy, but they achieve this in different ways. This comprehensive comparison will help you understand the key differences between Brave and DuckDuckGo , enabling you to choose the one that best suits your needs. Overview of Brave Brave Browser was launched in 2016 by Brendan Eich, co-founder of Mozilla. It is built on the Chromium engine, which also powers Google Chrome. Brave’s primary focus is on speed, privacy, and user control over online advertising. Key Features of Brave: Ad Blocking: Brave automatically blocks ads and trackers by default, which not only enhances privacy but also speeds up browsing. Brave Rewards: Users can opt-in to see privacy-respecting ads and earn Basic Attention Tokens (BAT) as a reward. HTTPS Everywhere: Brave uses HTTPS Everywhere to ensure secure, encrypted connections whenever possible. Fingerprinting Protection: This feature prevents websites from tracking users based on their unique browser and device characteristics. Integrated Tor: Brave offers an integrated Tor feature for enhanced anonymity by routing your browsing through the Tor network. Overview of DuckDuckGo DuckDuckGo started as a privacy-focused search engine in 2008, later expanding to include a mobile browser and browser extensions. The company emphasizes that it does not track its users and aims to provide a secure browsing experience. Key Features of DuckDuckGo: Privacy Protection: DuckDuckGo blocks third-party trackers and ensures your searches are not tracked. Encryption Enforcement: Similar to Brave, DuckDuckGo forces websites to use encrypted connections when available. Privacy Grade: Websites are given a privacy grade (A-F) based on the number of trackers and the presence of encryption, helping users understand the privacy implications of the sites they visit. Simple Interface: DuckDuckGo focuses on simplicity and ease of use, making it accessible to users who are less tech-savvy. User Interface and Experience Brave: The user interface of Brave is clean and user-friendly, resembling Google Chrome. This familiarity makes it easy for new users to transition. The browser also offers extensive customization options, allowing users to tailor their browsing experience to their preferences. DuckDuckGo: The DuckDuckGo browser provides a minimalistic and straightforward interface. It is designed to be intuitive, ensuring that even users with limited technical knowledge can navigate and use the browser effectively. Performance and Speed Brave: By blocking ads and trackers by default, Brave significantly reduces the amount of data that needs to be loaded, leading to faster page load times. This efficiency makes Brave one of the fastest browsers available. DuckDuckGo: While DuckDuckGo also blocks trackers, its performance can vary slightly depending on the complexity of the web pages being loaded. It is generally fast but may not always match the speed of Brave. Privacy and Security Brave: Brave’s robust privacy features, including its built-in ad blocker, HTTPS Everywhere, and fingerprinting protection, provide comprehensive security. The integrated Tor feature offers an additional layer of anonymity for those needing extra protection. DuckDuckGo: DuckDuckGo’s privacy measures are primarily focused on preventing tracking and ensuring encrypted connections. Its Privacy Grade feature gives users immediate insight into the privacy practices of the sites they visit. Advertising and Monetization Brave: Brave’s unique approach to advertising involves offering privacy-respecting ads that users can opt into. In return, users earn BAT, a cryptocurrency that can be used to support content creators or exchanged for rewards. DuckDuckGo: DuckDuckGo does not display traditional ads or track users for advertising purposes. It relies on non-tracking ads that are based on the current search query, ensuring that users' personal data is not used for ad targeting. Compatibility and Extensions Brave: Being built on Chromium, Brave supports a wide range of extensions available on the Chrome Web Store. This compatibility allows users to enhance their browsing experience with various tools and add-ons. DuckDuckGo: DuckDuckGo’s mobile browser does not support extensions, which might limit its functionality for some users. However, its focus on privacy ensures that it provides a secure experience out-of-the-box. Customization and User Control Brave: Brave offers extensive customization options, including the ability to manage security settings, choose which ads to see, and decide how to handle trackers. This level of control allows users to tailor their browsing experience according to their privacy preferences. DuckDuckGo: DuckDuckGo’s customization options are more limited, focusing on simplicity and ease of use. It provides essential privacy features without overwhelming users with complex settings. Open Source and Transparency Brave: Brave is open-source, meaning its code is publicly available for scrutiny. This transparency allows users and developers to verify its security claims and contribute to its development. DuckDuckGo: DuckDuckGo’s search engine and browser extensions are not fully open-source, which might raise concerns for users who prioritize transparency. However, the company is committed to privacy and has built a strong reputation in this area. Community and Support Brave: Brave has an active community of users and developers who contribute to its development and provide support. The company also offers detailed documentation and a support forum to assist users. DuckDuckGo: DuckDuckGo provides support through its website, offering a range of guides and FAQs to help users navigate privacy settings and features. Its community is smaller compared to Brave but remains dedicated to privacy advocacy. Conclusion: Which Browser Should You Choose? Choosing between Brave and DuckDuckGo ultimately depends on your specific needs and preferences. If you prioritize speed, extensive customization, and the ability to earn rewards through privacy-respecting ads, Brave may be the better choice. On the other hand, if you prefer a simple, no-frills browser with robust privacy protections and do not require extensions, DuckDuckGo is an excellent option. Both browsers offer significant privacy benefits over traditional options like Google Chrome and Safari. By understanding the differences between Brave and DuckDuckGo, you can make an informed decision that best aligns with your privacy and browsing needs.
- What is Ziptie Ai Search Analytics ?
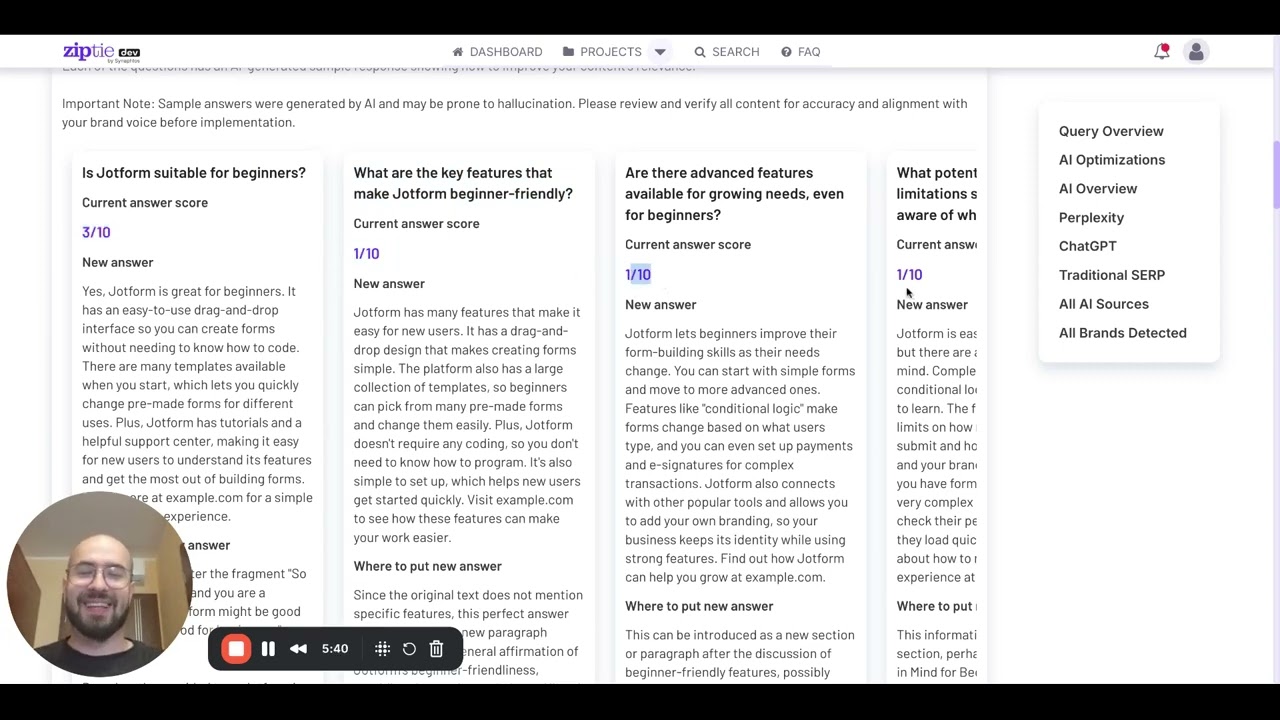
Ziptie AI Search Analytics is a data-analysis platform designed to help organizations understand how users search, what they are looking for, and where search experiences succeed or fail. It focuses on turning raw search data—queries, clicks, refinements, and drop-offs—into actionable insights that improve findability, user experience, and business outcomes. At its core, Ziptie AI analyzes internal or site-specific search behavior rather than public search engines like Google. This makes it especially relevant for websites, knowledge bases, e-commerce platforms, and internal enterprise tools where search quality directly affects conversions, productivity, or customer satisfaction. Instead of simply reporting what people searched for, the platform applies AI-driven analysis to detect patterns, intent, and friction points in the search journey. Using Ziptie AI Insights to Optimize Content for AI-Driven Discovery A key function of Ziptie AI Search Analytics is identifying search gaps . These occur when users search for something but do not find relevant results, abandon the search, or repeatedly reformulate queries. By surfacing these gaps, organizations can spot missing content, poorly labeled products, ineffective synonyms, or UX issues that block users from finding what they need. This insight is critical because failed searches often signal lost revenue, higher support costs, or user frustration. Ziptie AI also emphasizes intent analysis . Rather than treating all queries as isolated keywords, the system looks at how users phrase searches, how they refine them, and what actions follow. This helps teams distinguish between informational intent, navigational intent, and transactional intent. Understanding intent allows content teams, product managers, and marketers to align search results more closely with real user goals. Another important aspect is behavioral analytics tied to search. Ziptie AI tracks what users do after searching—whether they click a result, scroll, exit, or convert. This post-search behavior provides context that simple keyword reports cannot. For example, a high-volume query with low click-through may indicate irrelevant results, while a low-volume query with high conversion may reveal a niche but valuable need worth expanding. Turning Search Data Into Actionable Business Decisions From an operational perspective, Ziptie AI Search Analytics supports data-driven optimization . Insights from the platform can guide decisions such as improving search relevance, adding synonyms, restructuring navigation, creating new content, or prioritizing product inventory. Over time, this reduces guesswork and replaces subjective assumptions about user behavior with measurable evidence. In practical terms, Ziptie AI Search Analytics is most useful for organizations that rely heavily on search as a discovery mechanism. This includes e-commerce sites aiming to reduce zero-result searches, SaaS platforms improving in-app help systems, and enterprises seeking to optimize internal knowledge sharing. By revealing how users actually search—and where they struggle—the platform helps transform search from a passive feature into a strategic asset. Who’s Actually Using Ziptie Successfully While Ziptie (also referred to as ZipTie.dev in some contexts) is still an emerging platform rather than a household-name enterprise stack, there are multiple verified practitioners and companies publicly sharing how they’re using it for real business value , especially in SEO and AI visibility workflows. SEO Leaders & Industry Experts Lily Ray , Vice President at Amsive — publicly recommends Ziptie as her go-to tool for monitoring how sites and competitors show up inside Google AI Overviews and other AI-generated answers, and to assess how that impacts traffic and optimization decisions. Aleyda Solis , internationally respected SEO consultant — notes that Ziptie has become essential for tracking AI Overview landscapes as they roll out across search engines and for competitive research in AI search. Kevin Indig , seasoned SEO strategist — highlights that Ziptie’s combination of site indexing and AI Overview tracking fills a gap that most tools don’t cover, making it a practical part of modern SEO workflows. These mentions come directly from the official Ziptie testimonial page , where experienced SEO leaders vouch for its utility in real visibility work. Agencies Using Ziptie for Client Work Virayo , an SEO and digital growth agency, uses Ziptie to measure LLM Share of Voice , AI-generated referral traffic , and visibility trends across multiple clients. Their public LinkedIn post describes how Ziptie helped them identify gaps where a SaaS client was being mentioned in AI answers but not cited , and how that informed follow-up content and aggregation strategies to improve both organic and AI search outcomes. While Ziptie-specific enterprise case studies (e.g., Fortune 500 customers) aren’t widely published yet, these documented professional endorsements and agency workflows show that SEO teams and agencies already rely on Ziptie in real projects to measure AI Search performance and shape strategy . How to Get Started with Ziptie AI Search Analytics Tracking AI visibility isn’t something you “turn on.” It’s something you build into your marketing workflow. Here’s a simple way to start using Ziptie strategically instead of randomly poking around dashboards. 1. Define What Visibility Actually Means for You Before logging in, clarify: Are you tracking brand mentions? Product recommendations? Competitor comparisons? Informational queries in your niche? AI search is intent-heavy. If you don’t define what matters, you’ll end up measuring noise. Start with 20–50 high-intent prompts your customers would realistically ask AI tools. 2. Benchmark Your Current AI Presence Use Ziptie to: See whether your brand appears in AI Overviews or LLM responses Identify whether you’re cited, mentioned, or completely ignored Track which competitors show up instead This gives you your “AI Share of Voice” baseline. No baseline = no strategy. 3. Analyze Why Competitors Are Winning If competitors appear in AI answers and you don’t, look at: Content structure (clear definitions, lists, comparisons) Authority signals (citations, backlinks, brand mentions) Depth and clarity of explanation AI models tend to favor structured, factual, and citation-ready content. They reward clarity, not fluff. 4. Optimize Content for AI Citation This isn’t about gaming the system. It’s about making your content easier to extract. Improve: Clear headings that match real user prompts Concise, factual answers within articles Structured comparisons and definitions Authoritativeness and source credibility Think: “Would an AI confidently quote this?” 5. Monitor Trends, Not Just Snapshots AI search visibility changes frequently. Track: Gains or losses in AI presence Emerging prompts where your competitors start appearing Traffic shifts from AI referrals Consistency matters more than one good week. 6. Integrate It Into Your SEO & Content Workflow Ziptie should not live in isolation. It should inform: Blog content planning Product page updates PR and authority building Technical SEO improvements AI visibility is becoming part of overall search performance — not a separate universe. Here’s the bigger picture: traditional SEO was about ranking positions. AI search is about being selected as a source of truth. That’s a philosophical shift as much as a tactical one. The companies that adapt early treat AI visibility like they treated Google rankings in 2008 — a new frontier that looks confusing now but will feel obvious later. Why AI Search Visibility Is Becoming a Competitive Battleground Understanding what Ziptie does is only the beginning. The bigger question is this: What happens to your brand when AI starts choosing the answers instead of ranking them? Search is shifting from a ranking model to a selection model. And that changes everything. The Hidden Risk: Invisible Brand Erosion Here’s the uncomfortable reality most companies haven’t processed yet: You can still rank #1 in Google…and not appear in AI-generated answers at all. When AI Overviews or LLM responses summarize information, they often cite only a handful of sources. If your brand isn’t selected, your authority effectively disappears from the conversation — even if your traditional SEO performance looks healthy. This creates a dangerous illusion: Your dashboards say you’re winning.AI answers say otherwise. Over time, that gap can quietly reshape brand perception, referral traffic, and market authority. Ziptie’s real value isn’t just tracking inclusion — it reveals whether you’re being erased from the emerging answer layer of search. AI Doesn’t Rank. It Selects. Traditional SEO is about ranking positions. AI search is about being selected as a trusted source. Ranking is competitive positioning.Selection is trust filtration. When a model synthesizes an answer, it compresses dozens of potential sources into a few citations. Only a small number of brands get surfaced repeatedly. And repeated citation reinforces perceived authority. That creates a feedback loop: Selected brands become more visible →Users trust them more →AI continues citing them. That loop is powerful — and difficult to break once competitors dominate it. This Is Bigger Than Google AI visibility now spans multiple systems: Google AI Overviews ChatGPT browsing responses Perplexity Bing Copilot Other emerging LLM-driven interfaces Each model behaves slightly differently. Some favor structured content. Some prioritize clarity and concise definitions. Some emphasize domain authority signals. This fragmentation makes manual tracking nearly impossible at scale. Tools like Ziptie help centralize that monitoring across AI environments instead of relying on assumptions. Search is no longer one ecosystem. It’s a network of AI-driven answer engines. What Happens If You Ignore AI Visibility? The impact isn’t immediate. That’s what makes it dangerous. If competitors consistently appear in AI answers and you don’t: They become the “default recommendation.” Their brand is reinforced in educational queries. Their authority compounds over time. User recall shifts subtly but steadily. This doesn’t happen overnight. It happens gradually — and then suddenly. By the time traffic shifts become obvious, AI systems may already be trained to associate trust with your competitors instead of you. Early Market Signals We’re already seeing measurable shifts: Informational queries increasingly resolved inside AI summaries. Fewer clicks for certain top-of-funnel keywords. Brands optimizing not just for ranking, but for AI citation likelihood. Transactional and high-intent queries still rely heavily on traditional search. But informational dominance is moving into AI interfaces. That makes AI visibility a strategic hedge — not just an experiment. A Realistic Scenario Imagine a SaaS company ranking second for “best project management software.” Organic traffic looks stable. But AI-generated answers consistently recommend three competitors instead. Those competitors get cited in summaries, buying guides, and comparison prompts. Over 12–18 months: AI keeps citing the same names. Review sites reinforce those names. Social discussions echo those names. Market perception subtly shifts. Nothing dramatic. No sudden crash. Just a steady migration of authority. This is the kind of slow-motion shift that AI search visibility tracking is designed to catch early. A Forward-Looking Perspective This is not a prediction — just a working theory. If AI-driven answers continue expanding, we may eventually see something akin to “AI authority scoring” become as important as domain authority once was. In other words, brands won’t just ask: “Where do we rank?” They’ll ask: “Are we being chosen?” That’s a fundamentally different question. The Bottom Line AI search visibility is not replacing SEO. It’s adding a new layer on top of it. Traditional rankings still matter. Technical SEO still matters. Content quality still matters. But now there’s a second battlefield — the answer layer. And companies that measure it early will understand the shift before it becomes obvious to everyone else. In Conclusion Ziptie AI Search Analytics is no longer just about tracking search performance. It’s about understanding how AI systems interpret your brand, when they select you as a trusted source, and when they silently replace you with a competitor. Search has evolved from ranking pages to selecting answers. That shift demands a new layer of visibility — one that measures inclusion, citation frequency, competitive presence, and AI-driven authority signals across multiple platforms. The companies that win in this next phase won’t just optimize for keywords. They’ll optimize for selection. If your brand isn’t being surfaced inside AI-generated answers, you may already be losing ground without realizing it. At Emerald Sky , we help businesses navigate this transition — combining technical SEO, structured content strategy, and AI visibility tracking to ensure you’re not just indexed, but chosen. If you’re ready to understand how your brand performs in AI search environments — and build a strategy that keeps you visible as search evolves — get in touch with our team.
- How Do I Connect Printify to Wix?
Connecting Printify to Wix allows you to sell print-on-demand products directly from your Wix website while Printify handles printing and fulfillment automatically. Once connected, orders placed on your Wix store are sent to Printify, produced by your chosen print provider, and shipped to your customers without manual intervention. This guide walks through the full process step by step, from prerequisites to publishing products and verifying the integration. What You Need Before You Start Before connecting Printify to Wix, make sure the following are already in place: You must have an active Wix site with Wix Stores installed .You need a Printify account (free or paid plans both work).Your Wix site must be published at least once.You must be logged into both platforms using the same browser session to avoid permission issues. If any of these are missing, the connection will fail or remain incomplete. Step 1: Prepare Your Wix Store Log in to your Wix dashboard. Go to Edit Site , then open the App Market and install Wix Stores if it is not already installed. Once installed, open the Store Dashboard and complete the basic store setup: Add store name Set store currency Configure checkout basics Enable payments (you can finish payment setup later, but the store must exist) Save and publish your site. This step creates the product infrastructure Printify needs to push products into Wix. Step 2: Log In to Printify Go to Printify and log in to your account. If this is a new account: Choose your store currency Add billing information (required for order fulfillment) Set your return address (important for shipping labels) You do not need to create any products yet. Step 3: Connect Printify to Wix Inside Printify: Open My Stores Click Add New Store Select Wix from the platform list You will be redirected to Wix and asked to approve the connection. Accept all permissions. These allow Printify to: Create products Sync pricing Receive orders Update order statuses Once approved, you will be redirected back to Printify and your Wix store will appear under My Stores . At this point, the connection is technically complete. Step 4: Create a Product in Printify Now you create products inside Printify, not Wix. In Printify: Click Create Product Choose a product category (t-shirt, hoodie, mug, poster, etc.) Select a print provider Choose sizes, colors, and variants Upload your design Adjust placement and scaling Set your pricing (Printify shows base cost vs profit) Pay attention to: Shipping costs Print provider location Production time These directly affect customer experience. Step 5: Publish the Product to Wix Once the product is configured: Click Publish Select your connected Wix store Confirm product details Printify will automatically: Create the product in Wix Add all variants Sync prices Attach mockup images This process can take a few seconds to a few minutes. Step 6: Review the Product in Wix Go back to your Wix dashboard. Navigate to Store Products and open the newly added item. Check: Product title and description Variant names and pricing Images and mockups Tax and shipping settings You can safely edit: Product descriptions SEO settings Categories Collections Do not delete variants or change SKU structures unless you understand Printify syncing behavior. Step 7: Test the Full Order Flow Before launching publicly, run a test order. Steps: Add the product to your cart on the live site Complete checkout using a real payment method Confirm the order appears in Wix Confirm the order appears in Printify Check order status syncing Once paid, Printify will automatically send the order to production unless manual approval is enabled. Common Issues and How to Fix Them Products not appearing in Wix Refresh the Wix dashboard and wait a few minutes. If still missing, republish from Printify. Prices not matching Pricing is controlled by Printify. Re-sync the product instead of editing price manually in Wix. Shipping looks wrong Shipping rates come from the print provider. Review shipping profiles inside Printify. Order stuck in “Pending” Check payment status in Wix. Printify only fulfills paid orders. How Updates Work After Connection When connected: Product edits in Printify sync to Wix Order updates in Printify sync to Wix Tracking numbers sync automatically Fulfillment status updates in real time Design changes require republishing the product. Final Thoughts Connecting Printify to Wix turns your website into a fully automated print-on-demand store. Once the integration is set up correctly, your main focus becomes design, marketing, and customer experience instead of logistics. The key to avoiding issues is understanding that Printify controls production and fulfillment , while Wix controls storefront presentation and checkout . Treat them as two parts of the same machine, not duplicates of each other. If you need help from a Wix Professional, don't hesitate to get in touch , our specialists will help you.
- How to Unpublish a Page in Wix (Step by Step)
Unpublishing a page in Wix removes it from the live site without deleting it. The page stays in your editor, but visitors can’t see it online. This is useful when a page is outdated, under construction, or seasonal. Step 1: Open the Wix Editor Log in to your Wix account and open the site you want to edit. Click Edit Site to enter the Wix Editor. Step 2: Open the Pages Panel On the left side of the editor, click Pages & Menu (the pages icon). This opens the full list of pages on your site. Step 3: Find the Page You Want to Unpublish Scroll through the list and locate the page you want to remove from the live site. Step 4: Open Page Settings Hover over the page name, then click the three dots (⋯) next to it.From the menu, select Settings . Step 5: Unpublish the Page In the Page Settings panel, find the Page Status or Permissions section.Toggle the option to Unpublished (or disable “Show in Menu” and set access restrictions, depending on page type). The page is now unpublished and no longer accessible to visitors. Step 6: Publish Your Site Click Publish in the top-right corner of the editor.This step is required for the unpublishing change to take effect on the live site. What Happens After You Unpublish a Page in Wix ? The page is not deleted and can be republished anytime Visitors will see a 404 error if they try to access the old URL The page won’t appear in menus or navigation Search engines may eventually remove it from search results Optional: Republish the Page Later To republish, go back to Pages & Menu , open the page’s settings, switch it back to Published , and click Publish again. This approach keeps your site clean and flexible while preserving your work behind the scenes. Need the help of a Wix Professional? Get in Touch With Us!
- Boost Your Online Presence with SEO
In today’s digital world, standing out online is not just an option - it’s a necessity. If you want your business to thrive, you need to be visible where your customers are searching. That’s where SEO optimization solutions come into play. They are the secret sauce that can transform your website from a hidden gem into a shining star on search engines. Ready to dive in and discover how to boost your online presence? Let’s get started! Why You Need SEO Optimization Solutions Now Imagine your website as a store in a massive city. Without signs, directions, or a map, how will people find you? SEO optimization solutions act like those signs and maps, guiding potential customers straight to your digital doorstep. But it’s not just about being found - it’s about being found by the right people. SEO optimization solutions help you: Increase organic traffic by improving your search engine rankings Build trust and credibility with your audience Enhance user experience on your website Generate higher quality leads that convert into sales Think about it: when was the last time you clicked past the first page of Google? Most people don’t. That’s why climbing to the top of search results is crucial. And with the right strategies, you can get there faster than you think. How SEO Optimization Solutions Work for Your Business SEO optimization solutions are not a one-size-fits-all deal. They involve a mix of techniques tailored to your unique business goals and audience. Here’s a quick breakdown of the key components: Keyword Research - Finding the exact words and phrases your potential customers use when searching. On-Page SEO - Optimizing your website’s content, titles, meta descriptions, and images to align with those keywords. Technical SEO - Ensuring your website loads fast, is mobile-friendly, and has a clean structure for search engines to crawl. Content Creation - Producing valuable, engaging content that answers your audience’s questions and keeps them coming back. Link Building - Earning backlinks from reputable sites to boost your site’s authority and trustworthiness. Each of these elements works together like a well-oiled machine, driving more traffic and increasing your chances of converting visitors into loyal customers. What is a search optimization service? If you’re wondering how to get all these SEO pieces working seamlessly, that’s where a search optimization service comes in. These services specialize in managing and executing SEO strategies tailored to your business needs. They take the guesswork out of SEO and provide expert guidance every step of the way. A professional search optimization service will: Conduct thorough audits of your current website and SEO performance Develop a customized SEO plan based on your industry and competition Implement on-page and off-page SEO tactics Monitor your progress with detailed reports and analytics Adjust strategies to keep up with search engine algorithm changes Partnering with a reliable search optimization service means you can focus on what you do best - running your business - while experts handle the complex world of SEO. For example, companies like Emerald Sky Group offer comprehensive search optimization services designed to elevate your online presence and help you overcome marketing challenges. Practical Tips to Boost Your SEO Today You don’t have to wait months to start seeing improvements. Here are some actionable steps you can take right now to enhance your SEO: Optimize Your Titles and Meta Descriptions: Make sure every page has a clear, keyword-rich title and a compelling meta description that encourages clicks. Improve Website Speed: Use tools like Google PageSpeed Insights to identify and fix slow-loading pages. Create Quality Content Regularly: Blog posts, videos, and infographics that provide real value will attract visitors and earn backlinks. Use Internal Linking: Connect related pages on your site to help search engines understand your content structure. Make Your Site Mobile-Friendly: With more users browsing on phones, a responsive design is essential. Remember, SEO is a marathon, not a sprint. Consistency and quality are your best friends here. Taking Your Online Presence to the Next Level SEO optimization solutions are powerful, but combining them with other digital marketing strategies can amplify your results. Think about integrating: Social Media Marketing: Drive traffic and engagement through platforms where your audience hangs out. Email Marketing: Nurture leads and keep your brand top of mind. Pay-Per-Click Advertising: Complement organic SEO with targeted ads for immediate visibility. By building a comprehensive digital marketing ecosystem, you create multiple touchpoints that guide potential customers through their buying journey. If you’re ready to elevate your brand and overcome marketing hurdles, consider partnering with experts who understand the nuances of SEO and digital marketing. With the right support, your business can achieve significant growth and become a leader in your industry. SEO optimization solutions are your ticket to a stronger, more visible online presence. Don’t let your competitors steal the spotlight. Take control of your digital future today and watch your business soar!
- What is a Website Title ?
You’ve probably noticed that little text at the top of your browser tab when you open a website. Maybe it’s a brand name, a catchy phrase, or just a plain old “Home.” That right there? That’s the website title — and it’s more important than it looks. A website title (also called a title tag) is one of the first things search engines and people see when interacting with a webpage. It’s the line of text that shows up in your browser tab, in Google search results, and in previews when someone shares a page on social media. It might seem like a small detail, but the title can make or break your first impression online. Whether you’re a business owner, a content creator, or just launching your first portfolio site, understanding how a website title works — and how to craft a good one — is crucial. Let’s break it all down: what a website title is, why it matters, how it affects SEO and user experience, and what best practices you should follow to get it right. What Exactly Is a Website Title? At its core, a website title is a piece of HTML code that defines the title of a web page. It sits within the section of a webpage’s HTML and is wrapped in a That one line of code can influence how people perceive your brand, how often they click your link in search engines, and even how your site ranks. But don’t let the techy part scare you off — the important thing is what the title communicates to users and how it's used. Where You See the Website Title Let’s go through all the common places the website title appears: Browser Tab: When you open a website, the title appears in the tab of your browser. It helps users identify and switch between tabs quickly. Search Engine Results Page (SERP): Google (and other search engines) show your page’s title as the blue clickable headline in search results. Social Media Previews: When you share a link on platforms like Facebook, LinkedIn, or Slack, the page title is used in the preview along with the meta description. Bookmarks and Favorites: If someone bookmarks your page, the title becomes the name of that bookmark. In short, the title tag is everywhere — even though it's invisible on the actual page, it's working behind the scenes to boost visibility, credibility, and clickability. Why Your Website Title Matters Now that we know what it is, let’s talk about why it matters so much . It’s not just a formality. The title tag serves multiple important roles: 1. SEO (Search Engine Optimization) Google pays a lot of attention to your title tag. It’s one of the strongest on-page SEO signals , helping search engines understand what your page is about. If your title includes relevant keywords that match a user’s search intent, it increases the chances of your page appearing in search results. Let’s say your website title is: “Handmade Leather Wallets | Isaac Craft Goods” If someone searches “handmade leather wallets,” your page is more likely to rank higher than a page with a vague title like: “Home Page” Search engines also consider click-through rate (CTR). A clear, compelling title encourages users to click your link — and that engagement can influence rankings over time. 2. User Experience Titles help users orient themselves . Whether they have five tabs open or are browsing through search results, a strong title gives them confidence that they’re clicking on the right thing. A good title sets expectations. If your title is misleading, vague, or overly clever, it can frustrate users or cause them to bounce. 3. First Impressions Your website title is often the first thing people see about your brand — before they even land on your page. That’s why it needs to be clear, accurate, and persuasive. Would you click on a page titled: “Welcome to Our Site”? Or one that says: “Affordable Web Design for Small Businesses | Isaac Web Studio” Titles give you a chance to pitch yourself. Use them wisely. The Anatomy of a Good Website Title Here’s what makes a great title tag: Relevant Keywords Include 1–2 main keywords that describe what the page is about. These should match what people are likely searching for. Bad: “Home”Good: “Custom Logo Design Services | Isaac Studio” Clear and Descriptive People should know what to expect before they even click. Avoid vagueness. Bad: “Click Here!”Good: “Interactive Motion Graphics Portfolio | Isaac Design” Compelling but Not Clickbaity It should be inviting without being misleading. You want users to feel satisfied when they land on the page. Bad: “You Won’t Believe This Design Hack!”Better: “10 Smart Layout Techniques for UI Designers” Unique Per Page Each page of your site should have its own unique title . Google doesn’t like duplicates. Neither do people. Bad: Using “Isaac Design” on every pageGood: “About Isaac – Digital Animator & Designer” Brand Name at the End This is a common structure that balances SEO with branding: Primary Keyword or Phrase | Brand Name Like this: “Modern Typography Trends for 2025 | Isaac Creative Lab” Best Practices for Writing Website Titles Let’s get practical. Here are some dos and don’ts to keep your titles optimized and user-friendly. DO: Keep it under 60 characters Google cuts off long titles. Try to stay under 60–65 characters to make sure your full title appears in search. Put keywords first Start with the most important topic, and add your brand name after a separator like a pipe (|) or hyphen. Match the page content Your title should reflect what’s actually on the page. Don’t promise what you can’t deliver. Use sentence case or title case For example: “Web Development Services” not “WEB DEVELOPMENT SERVICES” Write for humans, not just search engines Don’t stuff in keywords unnaturally. Clarity wins. DON’T: Use the same title tag on multiple pages Start every title with your brand name (unless you're super well-known) Go overboard with symbols, emojis, or ALL CAPS Ignore mobile — titles can be even more truncated on small screens Let your CMS generate boring auto-titles like “Untitled Page” or “New Post” Examples of Good vs. Bad Website Titles Let’s look at some real-world comparisons: Bad Title: “Home” Why It’s Bad: Too vague. Doesn’t say what the site is or who it’s for. Better Title: “Freelance Branding & Logo Design | Isaac Studio” Bad Title: “Blog” Better Title: “Design Tips, Branding Ideas, and Portfolio Insights | Isaac’s Blog” Bad Title: “Contact Us” Better Title: “Contact Isaac – Let’s Build Your Brand Together” How to Add or Edit Website Titles For HTML Sites: Just edit the For WordPress: Go to your post or page editor. Scroll to the SEO section (if you’re using a plugin like Yoast SEO or Rank Math ). You’ll see a field for the title tag — customize it there. For Webflow, Squarespace, or Wix: These platforms have a built-in SEO or page settings area where you can edit the title for each page. The Risk of Ignoring Your Website Titles If you don’t write your own title tags, Google will often auto-generate them — and trust me, it’s rarely pretty. You could end up with: Cut-off sentences Repetitive or irrelevant titles Poor rankings due to missing keywords Low click-through rates Confused users who leave right away A generic title is like showing up to a job interview in pajamas — it doesn’t tell the right story, and it definitely doesn’t build trust. Titles vs. H1 Tags — What’s the Difference? People often confuse the title tag with the H1 tag on a webpage. They’re both important but serve different purposes: Title Tag: Shows in browser tabs, search results, and social shares. It’s part of the page’s metadata. H1 Tag: The visible headline on your webpage. It helps users (and search engines) understand the structure and topic of the page. You can make them similar, but they don’t have to be identical. Just make sure both are relevant and descriptive. In Conclusion Your website title is the quiet MVP of your site. It works behind the scenes to improve your SEO, attract visitors, and communicate what you’re all about — often before your content even loads. So don’t overlook it. Craft titles with intention. Use them to tell people (and search engines) exactly what to expect and why they should care. Remember, you only get one chance at a first impression — and on the internet, that starts with your title.
- How to Favorite a Website on Mac (Without Overcomplicating It)
We’ve all been there—you find a site you know you’re going to visit again. Maybe it’s your favorite recipe blog, a design inspiration site, or a web-based tool you use every day. But then... you forget to save it. Fast forward to three days later, and now you’re digging through your history like a digital archaeologist. Let’s put an end to that nonsense. Favoriting (or bookmarking) a website on a Mac is quick, easy, and totally worth it— as long as you know where to look . In this blog, we’ll break down how to favorite a website on a Mac using all the major browsers, why it matters, and what to do if it’s not working. We’ll also hit you with some pro tips to keep your bookmarks organized and your browsing smooth.We’ve all been there—you find a site you know you’re going to visit again. Maybe it’s your favorite recipe blog, a design inspiration site, or a web-based tool you use every day. But then... you forget to save it. Fast forward to three days later, and now you’re digging through your history like a digital archaeologist. Let’s put an end to that nonsense. Favoriting (or bookmarking) a website on a Mac is quick, easy, and totally worth it— as long as you know where to look . In this blog, we’ll break down how to favorite a website on a Mac using all the major browsers, why it matters, and what to do if it’s not working. We’ll also hit you with some pro tips to keep your bookmarks organized and your browsing smooth. The Problem: Too Many Tabs, Too Little Time If you’re like most Mac users, your browser is a mess of tabs. You’ve got 12 tabs open, 5 of them are duplicates, and you’re afraid to close any because one of them was important . Sound familiar? That’s the exact problem favoriting a website solves. The risk of not favoriting your go-to websites: You’ll lose track, waste time searching, and possibly never find that gem of a website again. And if you’re working or studying online, that delay can mean missed deadlines, wasted effort, or even lost business opportunities. The Simple Solution: Bookmarking/Favoriting on Mac Let’s fix that in under 60 seconds. Below are step-by-step guides for the four most popular browsers on Mac: 1. Safari: The Mac Native Safari is the default browser for macOS. If you haven’t changed anything, this is what your Mac opens automatically. How to Favorite a Website in Safari Option 1: Use the Share Button Open Safari and go to the website you want to favorite. Click the Share icon (a square with an upward arrow) in the top toolbar. Select Add Bookmark or Add to Favorites from the dropdown. Choose where to save it: If you want it to appear on the Favorites Bar , select "Favorites." If you want to tuck it away for later, choose another folder. Click Add . Option 2: Use the Shortcut Press Command (⌘) + D to instantly bring up the bookmark window. Where Do Bookmarks Show Up in Safari? Favorites Bar : Right below the URL bar—quickest access. Sidebar : Click the sidebar icon (📚) and go to Bookmarks. Start Page : Your favorites show as icons on Safari’s New Tab page. Pro Tip: You can organize Safari bookmarks by dragging them directly in the Favorites Bar or Sidebar. 2. Google Chrome: For the Power Users Chrome is super popular among designers, devs, and anyone who lives in Google’s ecosystem. How to Favorite a Website in Chrome Option 1: Star Icon Go to the site. Click the star icon in the URL bar (far right side). Choose a name and location for the bookmark (e.g., “Bookmarks Bar” or a custom folder). Click Done . Option 2: Shortcut Press Command (⌘) + D just like in Safari. Where to See Your Bookmarks in Chrome Bookmarks Bar : Toggle it on by pressing Shift + Command + B . Bookmarks Manager : Click the three dots → Bookmarks → Bookmark Manager. Pro Tip: Use folders in your Bookmarks Bar to group bookmarks by type: Work, Fun, Tools, etc. Chrome also syncs across devices when you're signed in with a Google account. 3. Mozilla Firefox: Privacy First, Bookmarks Second Firefox might not be the flashiest, but it’s rock solid—especially if you care about privacy. How to Favorite a Website in Firefox Option 1: Click the Star Visit the site. Click the star icon in the URL bar. It’ll turn blue once saved. Click it again to edit the bookmark name, folder, or tags. Option 2: Shortcut Yep, Command (⌘) + D works here too. Where Are Firefox Bookmarks Stored? Library Menu : Click the hamburger icon (☰) → Bookmarks → Manage Bookmarks. Bookmarks Toolbar : Can be turned on via View → Toolbars → Bookmarks Toolbar. Pro Tip: Firefox lets you tag bookmarks, which is awesome if you want to find things by theme (like #design or #food). 4. Microsoft Edge: The New Kid That’s Actually Good Edge on Mac? Believe it or not, it’s actually solid—and based on the same Chromium engine as Chrome. How to Favorite a Website in Edge Option 1: Click the Star Go to your site. Click the star icon in the URL bar. Choose a folder and click Done . Option 2: Shortcut Still Command (⌘) + D . Consistency is a beautiful thing. Where to View Bookmarks (Favorites) Favorites Bar : Show or hide it by pressing Command + Shift + B . Favorites Menu : Click the star icon with three lines (in the toolbar) for a dropdown list. Pro Tip: Edge syncs favorites if you’re logged into a Microsoft account—so your stuff follows you from work to home. But Wait... What’s the Difference Between “Bookmark” and “Favorite”? Honestly? Not much. In most browsers, the terms are interchangeable. But if you want to get nitpicky: “Favorites” are typically bookmarks saved to your main bar or most-used folder. “Bookmarks” can include all saved sites, including stuff you don’t need often. In Safari, for example, you’ll add a bookmark but choose to save it in the Favorites folder if you want fast access. Troubleshooting: When the Star Icon Isn’t There Sometimes things don’t show up the way they should. If you can’t find the star icon or the bookmark isn’t saving, try this: Clear Cache & Restart the Browser Browsers get cluttered just like your desktop. Try quitting and reopening. Are You in Private Mode? Incognito/Private Mode doesn’t save bookmarks in some setups. Switch to a regular window. Permissions or Extensions Ad blockers or security extensions can interfere with browser toolbars. Disable them temporarily and test. Organizing Your Bookmarks Like a Pro Here’s where most people drop the ball—they save sites and never organize them. Then they wonder why they can’t find anything. Let’s change that. Tips for Bookmark Management: Create folders : Group by category—like “Inspiration,” “Tools,” “Recipes,” “Read Later,” or “Clients.” Use emojis in folder names: Helps you spot them quickly. Review monthly : Toss out dead links and outdated sites. Use a cloud sync : Chrome, Safari, Firefox, and Edge all sync across devices if you’re logged in. Bonus: Using the Dock or Desktop for Your Favorite Sites If you’re a minimalist and don’t want to even open a browser first, try this. Add Website to Dock Open Safari. Visit the site you want. Click and drag the URL from the address bar to the right side of the Dock (next to the Trash). Done! You now have a clickable shortcut straight from the Dock. Save Website as a Desktop Shortcut Open the site in Safari. Resize the browser window so you can see your desktop. Drag the URL icon (small globe or lock next to address) onto the desktop. Double-click anytime to open. Should You Use a Bookmark Manager App? If you’re really deep in the rabbit hole and have dozens (or hundreds) of bookmarks, third-party apps might be worth it. Popular Tools: Raindrop.io – Cross-platform, tags, thumbnails, clean UI. Pocket – Best for saving articles to read later. Pinboard – For nerds who like simple, text-based bookmark storage. These tools offer better search, organization, and long-term management than native browser bookmarks. Wrapping It Up: Why This Small Habit Pays Off Favoriting a website might seem like a tiny action, but it’s one of those tiny actions that compound . Save 30 seconds here, a few minutes there... and suddenly you’re more productive, less frustrated, and more in control of your workflow. Command + D is your best friend. Save to Favorites for fast access. Organize bookmarks monthly. Use folders and emojis to make them fun and functional. Next time you stumble on a site you like, don’t trust your memory—favorite it.
- How to Pin a Website to the Taskbar
We’ve all got that one website we use all the time — whether it’s your favorite project management tool, email inbox, or the news site you check 17 times a day. But if you’re still opening it by typing the URL every single time or hunting for it in bookmarks, you’re wasting precious seconds that add up fast. There’s a smarter, faster way: pin the website to your taskbar. It’s a small change that makes a big difference — especially if you're juggling multiple tools or working online. The Problem: Constantly Opening the Same Site Is a Time-Suck Think about your daily routine. How many times do you: Open a browser Type in a web address (or dig through bookmarks) Wait for it to load Finally start working It might feel like nothing, but over weeks and months, that’s hours lost on a repetitive task. Plus, there’s a mental cost — switching gears constantly adds up to burnout, especially for remote workers or anyone who works on a computer all day. This problem has a simple fix: treat your most-used website like an app. And just like apps, websites can live right in your taskbar for one-click access. The Solution: Pinning a Website to the Taskbar Here’s the plan — and we’ll cover Windows, macOS, and all the major browsers (Chrome, Edge, Firefox, Safari): Windows + Chrome Windows + Edge Windows + Firefox macOS + Safari macOS + Chrome or Edge Bonus: Turn any website into a desktop app Let’s break it down step by step. Windows: Pin Website to Taskbar Using Google Chrome Open the website in Chrome. Click the three-dot menu in the top-right corner. Hover over "More tools" , then click “Create shortcut…” In the popup, check “Open as window” and hit Create . A windowed version of the site opens — it looks like an app. Right-click the icon on your taskbar and choose “Pin to taskbar.” Now, it’s there for good — one click and you’re in. Windows: Pin Website with Microsoft Edge Edge actually makes this even smoother: Open the site in Edge . Click the three-dot menu in the top-right corner. Select "Apps" → "Install this site as an app" . Give it a name and hit Install . Edge creates a standalone app version of the website. Right-click the new icon in the taskbar and pin it . This works beautifully with Microsoft services like Outlook or Teams, but you can use it with anything — Gmail, Notion, Figma, you name it. Windows: What About Firefox? Firefox doesn't support "installing" websites as apps like Chrome or Edge. But you can create a shortcut that pins to the taskbar: Open the site in Firefox. Resize your browser so you can see part of your desktop. Drag the lock icon (next to the URL) to your desktop. Now right-click that new desktop shortcut and choose “Pin to taskbar.” It doesn’t open in a windowed mode like the others, but it works for fast access. macOS: Safari Users, You’ve Got Options While Safari doesn't support direct taskbar pinning, you can pin a site to your Dock : Open the site in Safari. Click and drag the URL from the address bar to the right side of your Dock (next to the trash). That’s it — one-click access from the Dock. If you want it to feel more like an app, try creating a shortcut with Automator or third-party tools like Fluid . macOS: Chrome or Edge If you prefer Chrome or Edge on Mac, you can use the same process as on Windows: Go to the site in Chrome or Edge. Click the three-dot menu > More Tools > Create shortcut / Install as app . Name it and choose Open as window . Chrome/Edge will place it in your Applications folder. From there, drag it to your Dock . Even better? You can set it to auto-launch when you log in. Bonus: Turn a Website Into a Full-Fledged Desktop App Want to go all in? Use tools like: WebCatalog Franz Rambox These apps let you turn any website into a dedicated desktop app — perfect if you juggle multiple accounts or want cleaner multitasking. Why This Tiny Hack Matters More Than You Think It’s easy to dismiss this as a “lazy person trick.” But here’s the deal: Less friction = more focus. You remove the small delays that break flow. Mental energy is precious. The fewer decisions and clicks, the better. It’s the digital equivalent of decluttering. Cleaner workspace = clearer mind. For people working online — designers, developers, writers, marketers — this is low-hanging productivity fruit. The Risk of Not Doing It: Death by 1000 Tabs If you don’t make this change, here’s what you’re likely dealing with: Dozens of open tabs — making your browser slow and your mind cluttered. Frequent distractions while you hunt for a site and end up scrolling social media. Extra clicks and repetitive actions that silently drain your energy. A less optimized workflow , especially if you’re on a laptop and constantly multitasking. The worst part? You might think you’re being productive — but these tiny inefficiencies can eat up entire days over the course of a year. Take Action: Pin That Site, Save Your Sanity It takes two minutes to set up, and once you do, it’s done. Pick one site you use every single day — maybe: Gmail Notion Trello LinkedIn YouTube (if you use it for work, of course 😉) Your company dashboard Then follow the steps above and pin it . Trust me — your future self will thank you. Extra Tip: Organize Your Taskbar Like a Pro Once you’re in the flow, take it further: Group related sites/apps next to each other Use icons only (right-click the taskbar > Taskbar settings) Pin your file folders or drives for even faster access Remove apps you don’t use daily — keep it clean Think of it as your digital control panel. The cleaner and faster it is, the smoother your workday runs. Final Thoughts Pinning a website to your taskbar seems like a small thing, but it’s one of those tweaks that makes a huge difference over time. It saves you clicks, keeps you focused, and removes unnecessary digital clutter. In a world where distractions are everywhere and time feels more precious than ever, this is one of those changes that just makes sense.
- How to Make a Desktop Shortcut for a Website (Windows & macOS)
In today’s world, speed and convenience are everything. And sometimes, you just want to open your favorite website with a single click—no typing, no bookmarks, no browser hunting. That’s where desktop shortcuts for websites come in. In this guide, we’re going to walk you through how to create a desktop shortcut for any website , whether you’re using Windows or macOS . It's simple, free, and takes less than a minute. How to Make a Website Shortcut on Windows Let’s start with Windows , since most people still use it at home and at work. There are several ways to do this depending on your browser: Chrome, Edge, or Firefox. You can also make one manually with just a right-click. Method 1: Using Google Chrome Open the website in Chrome. Click the three dots menu (top right). Go to More Tools > Create Shortcut . Name your shortcut. (Optional) Check "Open as window" if you want it to act like an app. Click Create . You’ll see a new shortcut on your desktop with the site’s icon. Double-click it, and boom—your site is up. Tip: “Open as window” makes the website feel like a real app, without browser tabs. Method 2: Using Microsoft Edge Open the website in Edge . Click the three dots menu . Go to Apps > Install this site as an app . Name it and click Install . It shows up on your desktop and even in the Start menu like a native app. Method 3: Manual Drag and Drop Resize your browser window so you can see both the desktop and browser. Click the lock icon (next to the website’s URL). Drag and drop it onto your desktop. Simple, old-school, and works in most browsers. The downside is that it opens in a regular browser tab. Method 4: Create a Custom Shortcut If you want more control: Right-click your desktop > New > Shortcut. In the location box, type the URL: https://example.com Click Next , name your shortcut. Click Finish . You can even change the icon: Right-click the shortcut > Properties > Change Icon. Browse to any .ico file or use built-in icons. How to Make a Website Shortcut on macOS Now let’s talk about Macs . The process is a bit different, but just as easy once you get the hang of it. Method 1: Using Google Chrome (Mac) Open the website in Chrome. Click the three dots menu > More Tools > Create Shortcut . Give it a name. Check “Open as window” (optional). Click Create . This creates a shortcut in your Applications folder . You can then: Drag it to the Dock . Add it to Launchpad . Or copy it to the desktop . If you don’t see the shortcut, go to:~/Applications/Chrome Apps Method 2: Using Safari + Automator This is the Mac-native way, using Automator . Open Automator (just search for it in Spotlight). Select New Document > Choose Application . In the search bar, type Get Specified URLs. Drag it to the workflow pane. Click Add and enter your website URL. Then, search for Website Popup or Display Webpages and drag that next. Save the app (File > Save) and name it. Save it to Desktop or Applications . Now double-click that “app,” and it opens the website. Method 3: Drag the URL to the Desktop Open Safari or Chrome . Highlight and drag the URL from the address bar to the desktop. Done. This creates a .webloc file. When you click it, it opens in the default browser. Method 4: Turn a Website into a Web App (Using Chrome) If you want the shortcut to behave like an app: In Chrome, go to your website. Click the three-dot menu > More Tools > Create Shortcut . Name it and check “Open as window.” Click Create . This puts it in your Applications folder. You can treat it like any other app. Bonus: Pin the Website Shortcut to Taskbar or Dock After creating a shortcut, you probably want quicker access—like from the taskbar (Windows) or the dock (macOS). On Windows: Right-click the shortcut > Pin to Taskbar or Pin to Start . You can also drag and drop it directly to the taskbar. On macOS: If it’s an app (created via Chrome or Automator), just open it. Then right-click on its icon in the Dock > Options > Keep in Dock . How to Change the Shortcut Icon The default icon is usually the website’s favicon. But you can personalize it. Windows: Right-click the shortcut > Properties . Click Change Icon . Choose from system icons or browse for .ico files. You can convert PNG/JPG to ICO using free tools like: https://www.icoconverter.com macOS: Get an image file (PNG or JPG). Open it in Preview > Command + A > Command + C. Right-click your app/shortcut > Get Info. Click the small icon in the top-left of the Info window. Press Command + V to paste. Boom—custom icon! Common Issues & Fixes Shortcut opens in the wrong browser – Set your default browser to the one you want the shortcut to open with. Shortcut doesn’t open anything – Double-check the URL. Make sure it starts with https://. Icons are blurry – Use high-resolution icons or .ico files made for Windows/Mac. Can't find Chrome shortcut on macOS – Look inside ~/Applications/Chrome Apps. Real-Life Use Cases Here are some examples of when creating a website shortcut is super helpful: Launching your webmail (like Outlook or Gmail) without opening the browser first. Creating a quick-access “app” for Notion , Slack , or ChatGPT . Opening your banking site securely and quickly. Giving your kids or parents access to their favorite site without confusion. Making a weather or news shortcut that you check every morning. Why Make a Desktop Shortcut for a Website? Before we jump into the “how,” let’s talk about the “why.” Why would you even want to put a website on your desktop? Here’s why it makes sense: Faster access : Instead of typing the URL or opening bookmarks, a single click opens the site. More productive workflow : Ideal for web apps like Gmail, Google Docs, Trello, or your client dashboard. Organize your tools : You can place shortcuts in folders, taskbars, or docks just like real apps. Helpful for non-techies : If you're helping family or coworkers, a desktop shortcut can keep things simple. Not creating shortcuts means wasting time daily, especially if you rely on certain websites for work, study, or productivity. Over time, those few extra seconds add up—and so does the frustration. Final Thoughts Creating a website shortcut on your desktop is one of those small tweaks that ends up saving you time and mental energy every day. Whether you’re on Windows or macOS , it’s easy to do and even easier to love once you get in the habit. So pick a site—your calendar, inbox, productivity tool, or even just your favorite café’s order page—and turn it into a shortcut. Your future self will thank you.